Payment links
Payment links provide a simple and efficient way for merchants to collect payments from customers. By sharing a URL, merchants can enable customers to make payments without requiring complex integrations or custom-built payment pages.
Payment links offer several benefits for merchants and customers alike:
- Simplicity and convenience
- No need for complex integrations; just generate and share.
- Customers can pay instantly without navigating complex payment pages.
- Versatility
- Can be used in various scenarios, from retail to services.
- Ideal for remote transactions or quick payments.
- Tracking and management
- Real-time tracking of payment status and customer activity.
- Efficient management of multiple payment links through the business portal.
Order Payment links on vippsmobilepay.com.
If you have a Checkout or Payment Integration-sales unit, you may already have access to the Payment links.
Pricing
Payment links are free to generate. All the payments made through a payment link are subject to a Vipps MobilePay Checkout fee. This is the same as you would pay for a regular Checkout transaction.
How it works
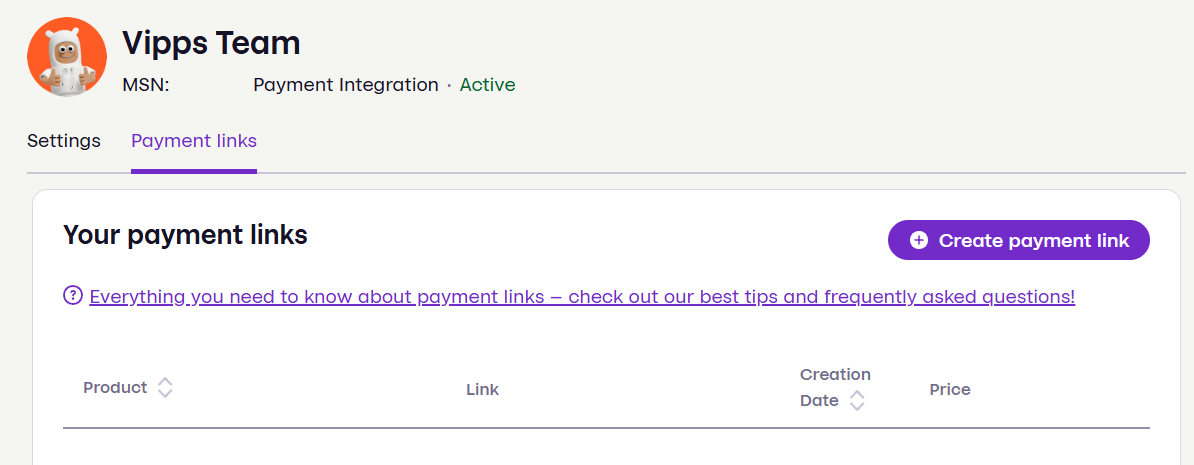
Access the payment links feature under the Payment Links tab of your sales unit on portal.vippsmobilepay.com/. To get started you first need to define some preferences, such as whether to automatically capture and complete purchases, and email notifications. After which you are ready to create your first payment link.
When you create a payment link, you:
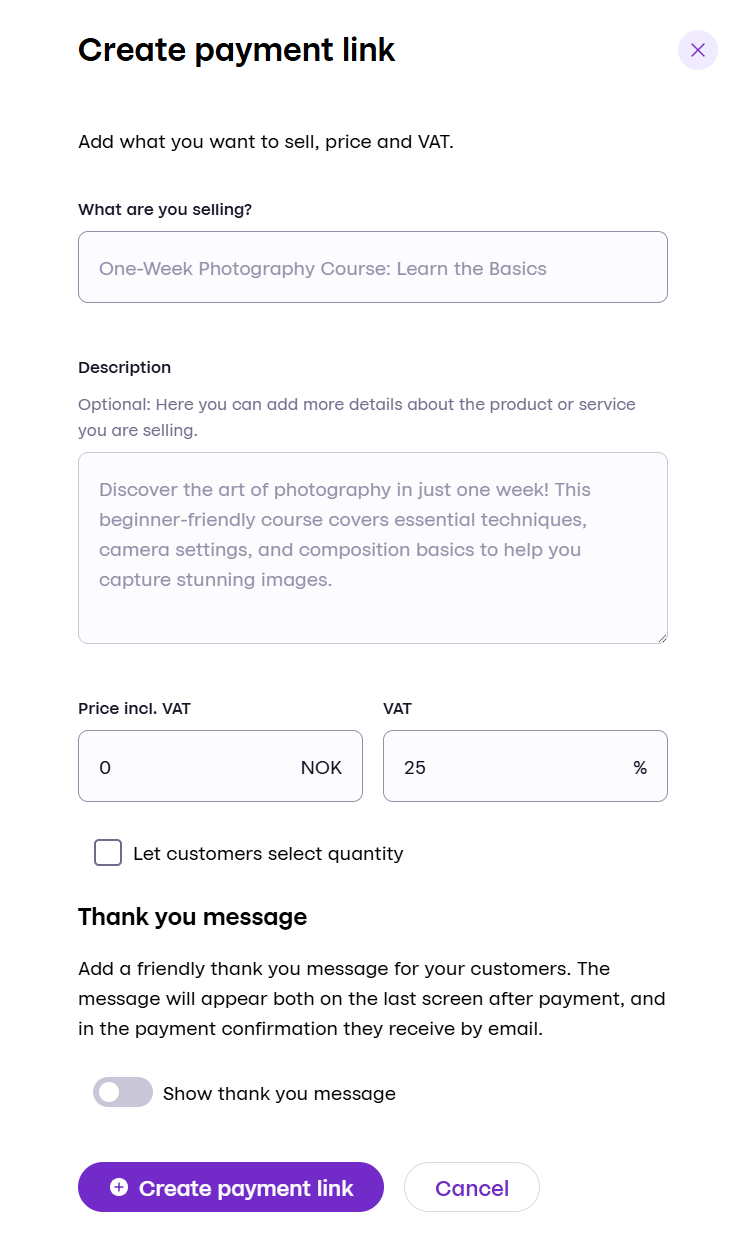
- Define the title and optional description of the product you are selling.
- Set the price and VAT of the product.
After clicking Create, we automatically screen the data you have entered to ensure that it is compliant with our terms of service and is allowed to be sold via our systems (read more about this under Screening below).
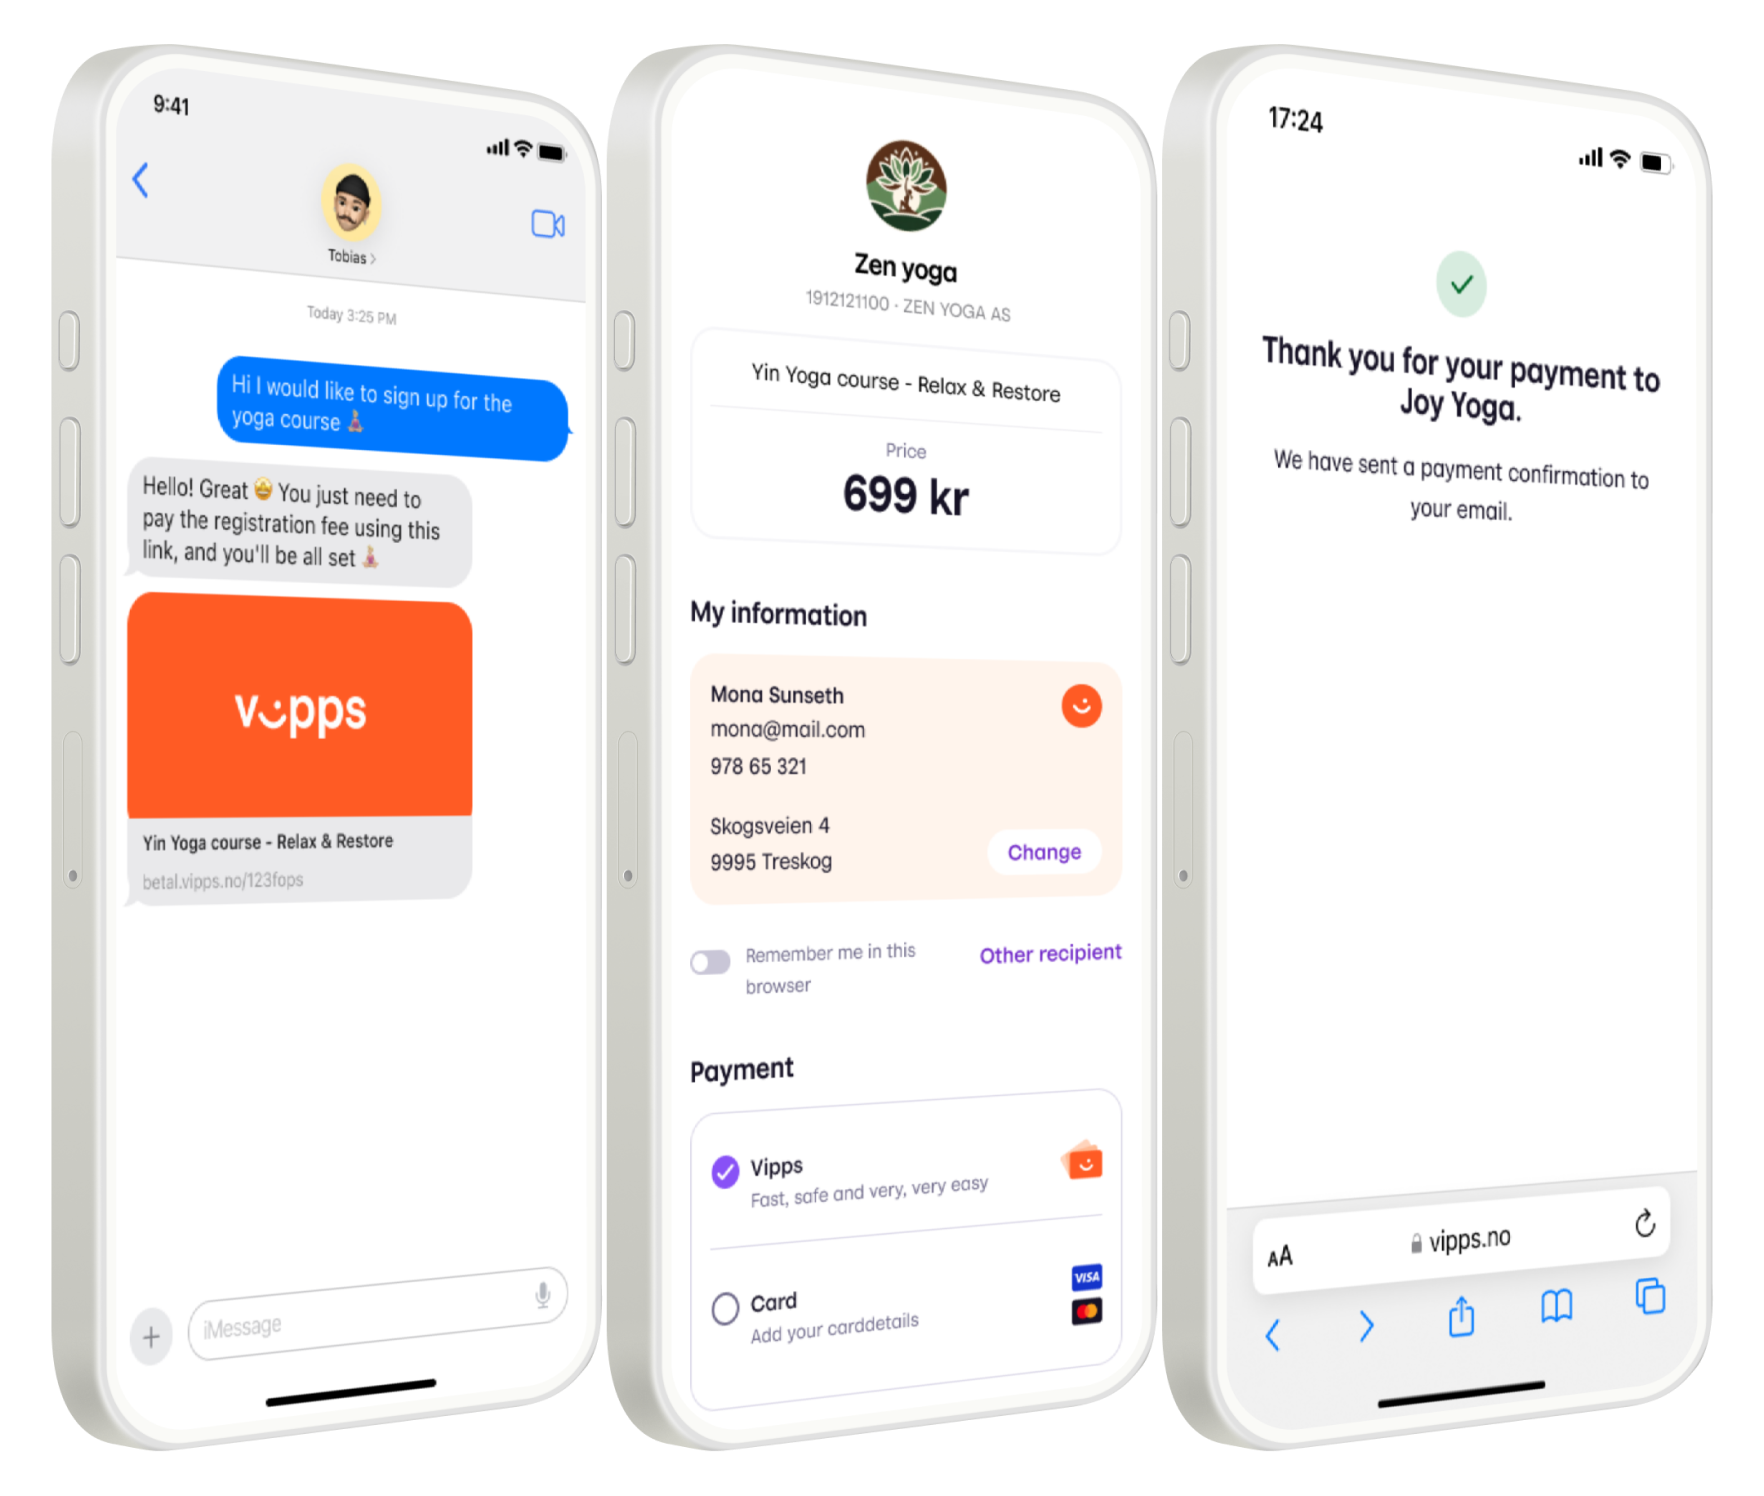
Once the link is created, you can share it with your customers via email, SMS, or any other channel.
The customer can then click the link and be redirected to a secure payment page where they can complete the payment using either Vipps MobilePay or card.
See How to create payment links and How to track the status of payment links below.
Capturing and monitoring your sales
You can view your sales on portal.vippsmobilepay.com/ under the Transaction view in the top-level menu. Here, you may capture payments, refund the customer or cancel payments at your leisure. If you've activated Automatic completion and capture of sales, you don't need to manually capture each sale. We also recommend enabling email notifications in your payment link's settings, this is the easiest way of getting notified when you've made a new sale.
Screening
When you create a payment link, we automatically screen the data you've entered. This is to ensure that it is compliant with our terms of service and is allowed to be sold via our systems. If the screening fails, you will receive an error message. If you get this error message and believe that you're within our terms of service, try to enter a more detailed description of the product you're selling, so we can make a more informed decision. If you still get the error message, please contact our support team.
Payment link preferences
When you first enable payment links in the business portal, you will get the option to set your preferences. You can change these later by going to the information panel for your sales unit and clicking the Edit button in the Payment Links section. The preferences are:
Email notifications
When a customer completes a payment, they are sent a confirmation email. You can also choose to receive an email notification when a customer completes a payment. This is useful if you want to be notified of new sales without having to check portal.vippsmobilepay.com/. We recommend enabling this option, as it is the easiest way to get notified of new sales.
Automatic completion and capture of sales
When this option is enabled, we will automatically complete and capture the payment when the customer completes the payment, meaning the money will automatically be transferred to your receiver account at the next settlement. This means that you do not need to manually capture each sale. If you do not enable this option, you will need to manually capture each sale in the business portal. You may refund the customer if you are not able to deliver the product or service.
Note: If you enable auto captures, you are responsible for complying with potential local laws surrounding captures of payments before delivery of the product or service.
How to create payment links
-
Check if you can generate payment links
- Go to the business portal
- Navigate to your chosen sales unit
- Open the information panel for the sales unit (for production sales units only)
- Under Your solution, find the Payment Links section.
- If it shows Active, then you are able to generate payment links.
- Click the Add button to order payment links.
-
Make a payment link
-
Under the Payment links tab in the information panel, click the Create new payment link button
-
-
Enter the details for the new link
-
Share the link
- Share the payment link however you want
- Everyone who clicks on the link can pay to you
Custom thank-you message
When creating a payment link, you can also set a custom thank-you message specific to this payment link. This message will be shown to the customer after they have completed the payment.
This is useful if you want to provide the customer with additional information, such as next steps or to add a friendly note thanking your customer for their purchase.
The thank-you message is optional, and if you do not define one, we will show a default message thanking the customer for their purchase. This thank-you message is on a per-link basis, meaning that you can define a different thank-you message for each payment link you create.
To add one, toggle the Show thank you message switch when creating a payment link, and enter your message in the text field that appears.
Creating a QR Code for a payment link
There is a simple, quick method to create a QR code for a payment link. Particularly useful for payment links that are shared in physical locations or printed materials. This can be done by clicking the three dots for a specific payment link and clicking View to get up the details panel. Here you may create a QR code for the payment link by clicking the Generate QR Code button, after which you can download the QR code image.
How to track the status of payment links
- Accessing the portal
- Open the information panel for the sales unit
- Navigate to the Payment links tab
- See your Payment links, add new, or delete existing payment links
- Monitoring link activity
- Go to the Transactions part of the portal
- Use filters to sort and categorize payment links
- Get customer and shipping information
- Go to the Transactions part of the portal
- Click on a line to view status of the payment, and the payee details
- Capturing/Refunding/Cancelling payments
- Go to the Transactions part of the portal
- Click on a line to view status of the payment, click capture to collect your funds* from the customer. For details about capture, cancel, and refunds, see the knowledge base.
info* If you have enabled automatic completion and capture of sales, the payment will be automatically captured when the customer pays.
Troubleshooting
If you encounter issues regarding payments, see General troubleshooting for common reasons why payments fail.